Lawnmower Operation Instructions
WB20ZB7 and WB450A models |
HOW TO USE YOUR LAWN MOWER
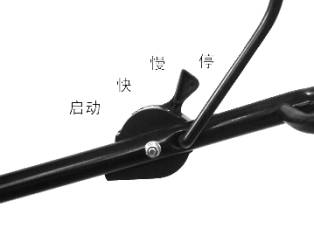
ENGINE SPEED (See Fig.1)
A throttle located on the side of the upper handle controls the engine speed. Fast position is for starting, normal cutting, trimming and better grass bagging. Slow position is for light cutting, trimming and fuel economy.

FIG.1
ENGINE ZONE CONTROL
●Your lawn mower is equipped with an operator presence control bar which requires the operator to be positioned behind the lawn mower handle to start and operate the lawn mower.
TO OPERATE DRIVE SYSTEM (See Fig.2)
- To start forward motion, lift drive control bar up to handle.
- To stop forward motion, release drive control bar.
IMPORTANT: ALWAYS KEEP DRIVE CONTROL FULLY ENGAGED AGAINST HANDLE WHEN IN USE.

FIG.2
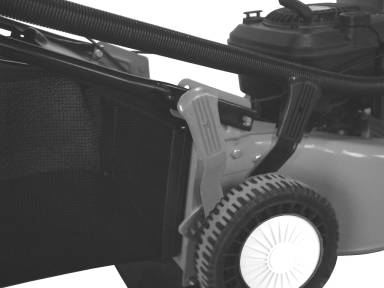
TO ADJUST CUTTING HEIGHT(See Fig.3)
- All four wheels are adjusted by a single lever.
- Pull adjuster lever toward wheel. To raise mower, move lever forward to desired position. To lower mower, move the lever toward the rear.

FIG.3
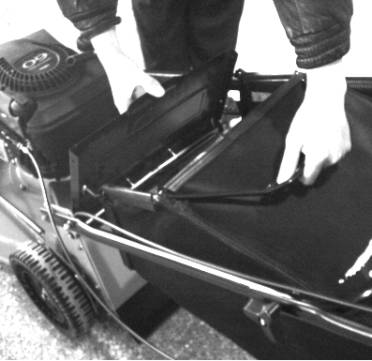
TO ATTACH GRASS CATCHER (See Fig.4)
- Lift the rear door of the lawn mower and place the grass catcher frame side hooks into the slots of the rear door.
- The grass catcher is secured to the lawn mower housing when the rear door is lowered onto the grass catcher frame.

FIG.4
CAUTION: Do not run your lawn mower without clipping deflector or approved grass catcher in place. Never attempt to operate the lawn mower with the rear door removed or propped open.
TO EMPTY GRASS CATCHER
- Lift up on grass catcher using the frame handle.
- Remove grass catcher with clippings from under lawn mower handle.
- Empty clippings from bag using both frame handle and bag handle.
NOTE: Do not drag the bag when emptying; it will cause unnecessary wear.
BEFORE STARTING ENGINE
ADD OIL
Your lawnmower is shipped without oil in the engine. Engine holds 20 oz. of oil. For type and grade of oil to use, see “ENGINE” in Customer Responsibilities section of this manual.
- Be sure lawnmower is level and area around oil fill is clean.
- Remove engine oil cap and fill to the full line on the dipstick. Pour oil slowly. Do not over fill.
NOTE: Allow oil to settle down into engine for accurate reading. To read proper level, tighten engine oil cap, then remove it to read the dipstick.
- Reinstall engine oil cap and tighten.
- Check oil level before each use. Add oil if needed. Fill to full line on dipstick.
- Change the oil after every 25 hours of operation or each season. You may need to change the oil more often under dusty, dirty conditions.
ADD GASOLINE
NOTE: Before filling fuel tank, remove and discard the debris plug that is inside the tank.
- Fill fuel tank. Use fresh, clean, regular unleaded gasoline with a minimum of 87 octants. Do not mix oil with gasoline. Purchase fuel in quantities that can be used within 30 days to assure fuel freshness.
TO START ENGINE
NOTE: Due to protective coatings on the engine, a small amount of smoke may be present during the initial use of the product and should be considered normal.
- To start a cold engine, push primer three times before trying to start. Use a firm push. This step is not usually necessary when starting an engine, which has already run for a few minutes.
- Move throttle control lever to fast position.
- Hold operate presence control bar down to the handle and pull starter handle quickly. Do not allow starter rope to snap back.
TO STOP ENGINE
To stop engine, release operator presence control bar.


